Adding a Field
After naming and saving your Farm, the next step is to map your Fields. Each Field is a physical location where crops are grown, and mapping is essential for spatial analysis, accurate metrics, and project reporting.
Add a New Field
To add a Field:
- From the right-hand navigation menu, click “Add Field.”
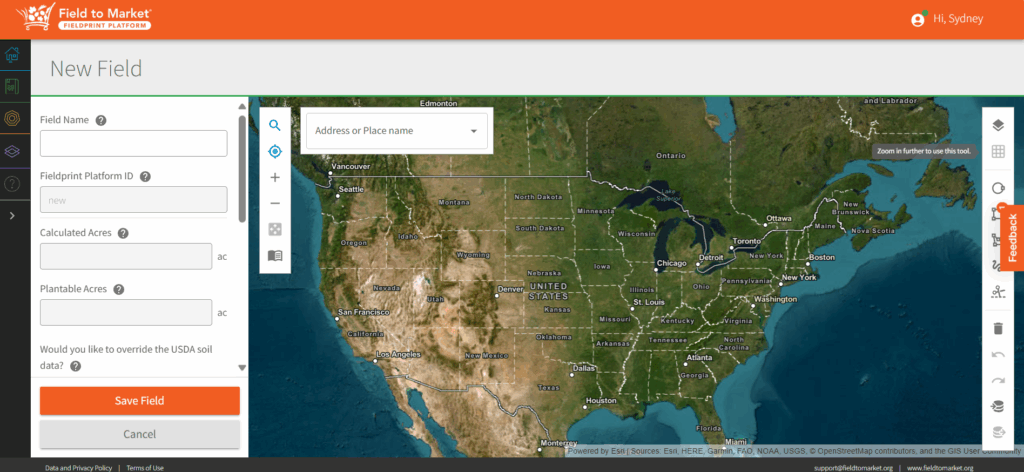
- The New Field Mapper will display on your screen. Give your Field a clear and unique name (e.g., “North Corn Field” or “West 40 Acres”) in the Field Name text box.
- Map the Field Boundary using the interactive Field Mapping Tool. You can use the search option that allows you to search for a specific address or the use the current location icon to quickly zoom to your field.
- You then need to outline the field boundary by:
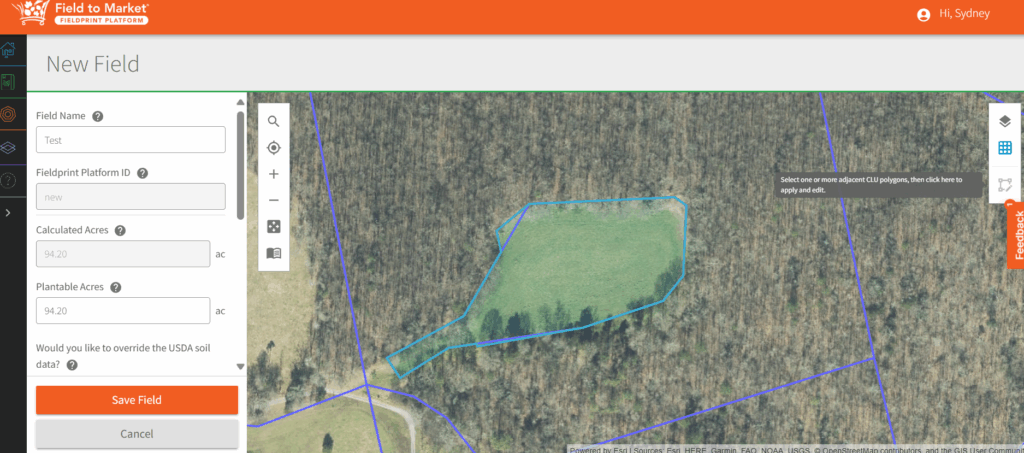
- Select the CLU Polygon: Once zoomed into the field, use the second from the top icon (Select CLU Polygon) to select your Field. Once the Field is selected, use the “Apply and Edit Selected Polygon Tool” to edit the field as needed, taking care to ensure only the plantable area is selected in the boundary.
- Upload a Shapefile: If you have GIS data, upload a compatible shapefile (.zip format) that contains your field boundary. (second icon from the bottom of the tool bar)
- Ensure all the automatically generated data is correct on the side bar (Calculated Acres, Plantable Acres, USDA soil data – Slope, Slope Length, Surface Soil Texture, Organic Matter Content, Percent Clay).
- Complete any additional Optional Field Details (Farm Serial Number, Tract Number, Field Number).
- Click “Save Field”. Your field is now added to your Farm, and you’ll be able to review prepopulated data and enter data for each crop year the field is planted.
Tips for Mapping:
- Ensure your field outline accurately matches the real-world boundaries.
- Avoid overlapping boundaries with other fields.
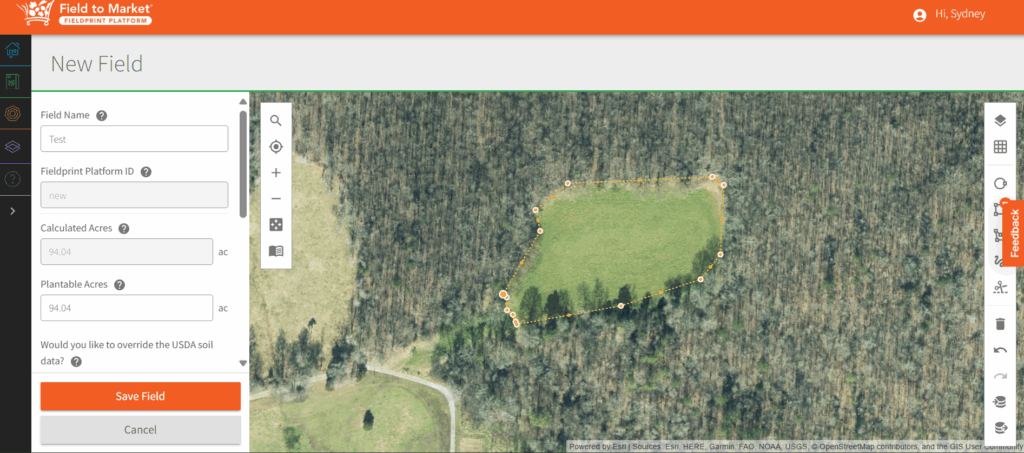
- You can adjust the boundary after drawing by clicking and dragging corner points.
- Use the trash can icon to delete a dot on the boundary or the complete boundary.
0 Comments